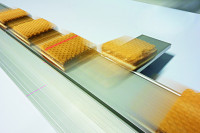
In chocolate bar production, 2D and 3D image processing systems are used to monitor quality criteria such as flaking, piled up bars, and a uniform appearance. Vision expert Bi-Ber individually sets up this technology for different production lines and products.
Chocolate bars must have a delicious and distinctive taste. But not only that: they must also meet the aesthetic expectations of consumers. Therefore, 100 % final visual inspection before packaging is needed. Since the human eye cannot keep up with the high speeds in industrial production, this task is carried out by vision systems, which can also directly trigger the ejection of faulty bars. The machine vision solution provides the added advantage that the results are based on verifiable features and can be automatically documented completely.
The Berlin-based image processing company Bi-Ber specializes in customer-specific inspection systems and has been working in the confectionery industry for more than two decades. The portfolio includes individually adapted systems for chocolate bar inspection. The company employs 2D cameras or 3D profile scanners, depending on the particular inspection task.
2D systems evaluate colour or grayscale images to detect misshapen bars and other production errors. Notably, they can monitor purely optical patterns such as decorative stripes. 3D scanners, on the other hand, are better suited to check volumetric properties. They reliably detect broken bars and bars that stick together.
These technologies are selected on a case-by-case basis and configured to meet individual requirements such as conveyor width, line speed, and tolerances. If necessary, Bi-Ber will also implement combined 2D and 3D inspection systems.
To measure the volume of chocolate bars, Bi-Ber uses 3D systems, such as Micro Epsilon profilers. A customer recently commissioned a three-pronged production plant for three product varieties, where the profilers inspect ten bars per second per line at conveyor speeds of up to 70 m/min.
The intelligent laser triangulation sensors analyse 300 profiles with 640 pixels each per second. At a scanning width of 100 mm, the resolution along the profile is around 0.16 mm/pixel and the height resolution is 12 µm/pixel. Brightness contrasts do not matter in this configuration. Bars of any colour are reliably scanned.
Three different products can be manufactured on the lines of this plant. Bi-Ber has programmed the Micro Epsilon smart sensors to check the customer-specified tolerances for the bars’ height, width, and height deviations. The scanner evaluates each profile by itself and submits pass/fail signals to the customer’s industrial control system. Bars that do not meet the specifications are ejected with an air blast. This ensures that only flawless products are packaged.
The inspection systems detect missing or broken layers and wrong shapes or irregular contours that can be caused by something like a protruding nut. Requiring no additional encoders, light barriers, image processing PCs, or control cabinets, they can be easily retrofitted in existing production lines.


